1. ItemsControl
- Item을 선택할 필요없이 데이터만 보여주기 위한 상황에서 사용하기 좋음
- Item을 선택해야 할 경우에는 ListBox나 ListView를 사용하는 것이 좋음
[예제 1]
- 데이터바인딩, 템플릿 사용
- TodoList
1) xmal
<Window x:Class="WpfTutorialSamples.ItemsControl.ItemsControlDataBindingSample"
        xmlns="http://schemas.microsoft.com/winfx/2006/xaml/presentation"
        xmlns:x="http://schemas.microsoft.com/winfx/2006/xaml"
        Title="ItemsControlDataBindingSample" Height="150" Width="300">
    <Grid Margin="10">
		<ItemsControl Name="icTodoList">
			<ItemsControl.ItemTemplate>
				<DataTemplate>
					<Grid Margin="0,0,0,5">
						<Grid.ColumnDefinitions>
							<ColumnDefinition Width="*" />
							<ColumnDefinition Width="100" />
						</Grid.ColumnDefinitions>
						<TextBlock Text="{Binding Title}" />
						<ProgressBar Grid.Column="1" Minimum="0" Maximum="100" Value="{Binding Completion}" />
					</Grid>
				</DataTemplate>
			</ItemsControl.ItemTemplate>
		</ItemsControl>
	</Grid>
</Window>
2) code-behind
using System;
using System.Windows;
using System.Collections.Generic;
namespace WpfTutorialSamples.ItemsControl
{
public partial class ItemsControlDataBindingSample : Window
{
public ItemsControlDataBindingSample()
{
InitializeComponent();
List<TodoItem> items = new List<TodoItem>();
items.Add(new TodoItem() { Title = "Complete this WPF tutorial", Completion = 45 });
items.Add(new TodoItem() { Title = "Learn C#", Completion = 80 });
items.Add(new TodoItem() { Title = "Wash the car", Completion = 0 });
icTodoList.ItemsSource = items;
}
}
public class TodoItem
{
public string Title { get; set; }
public int Completion { get; set; }
}
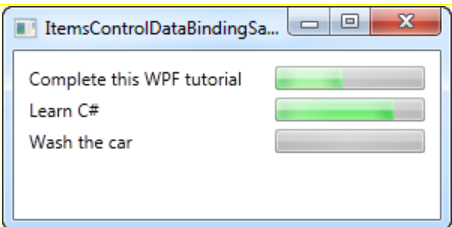
}3) 결과
- 데이터 바인딩을 통해 리스트에 Title과 Completion을 연결해주었다.
[예제 2]
- ItemPanelTemplate 사용 : 패널을 템플릿으로 사용
1) xaml
<Window x:Class="WpfTutorialSamples.ItemsControl.ItemsControlPanelSample"
        xmlns="http://schemas.microsoft.com/winfx/2006/xaml/presentation"
        xmlns:x="http://schemas.microsoft.com/winfx/2006/xaml"
		xmlns:system="clr-namespace:System;assembly=mscorlib"
        Title="ItemsControlPanelSample" Height="150" Width="250">
	<Grid Margin="10">
		<ItemsControl>
			<ItemsControl.ItemsPanel>
				<ItemsPanelTemplate>
					<UniformGrid Columns="2" />
				</ItemsPanelTemplate>
			</ItemsControl.ItemsPanel>
			<ItemsControl.ItemTemplate>
				<DataTemplate>
					<Button Content="{Binding}" Margin="0,0,5,5" />
				</DataTemplate>
			</ItemsControl.ItemTemplate>
			<system:String>Item #1</system:String>
			<system:String>Item #2</system:String>
			<system:String>Item #3</system:String>
			<system:String>Item #4</system:String>
			<system:String>Item #5</system:String>
		</ItemsControl>
	</Grid>
</Window>
2) 결과
- Wrap 패널을 사용한 버튼 생성을 명시했다.
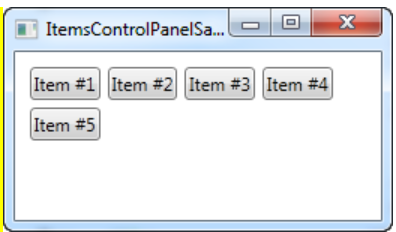
3) 변형
- ItemsPanelTemplate으로 Wrap 패널이 아닌 UniformGrid를 사용한 경우
<!--위의 코드에서 이 부분만 변경-->
<ItemsPanelTemplate>
	<UniformGrid Columns="2" />
</ItemsPanelTemplate>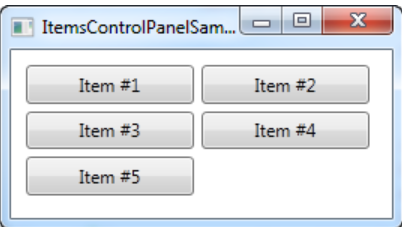
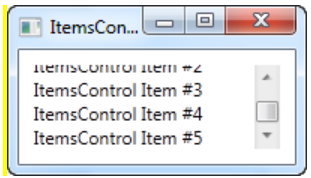
[예제 3]
- scrollbar 생성
1) xaml
<Window x:Class="WpfTutorialSamples.ItemsControl.ItemsControlSample"
        xmlns="http://schemas.microsoft.com/winfx/2006/xaml/presentation"
        xmlns:x="http://schemas.microsoft.com/winfx/2006/xaml"
		xmlns:system="clr-namespace:System;assembly=mscorlib"
        Title="ItemsControlSample" Height="150" Width="200">
	<Grid Margin="10">
		<ScrollViewer VerticalScrollBarVisibility="Auto" HorizontalScrollBarVisibility="Auto">
			<ItemsControl>
				<system:String>ItemsControl Item #1</system:String>
				<system:String>ItemsControl Item #2</system:String>
				<system:String>ItemsControl Item #3</system:String>
				<system:String>ItemsControl Item #4</system:String>
				<system:String>ItemsControl Item #5</system:String>
			</ItemsControl>
		</ScrollViewer>
	</Grid>
</Window>
2) 결과
2. ListBox
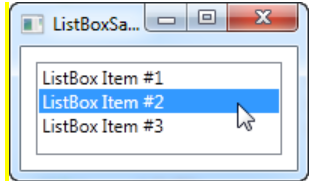
[예제 1]
- ListBox 기본형태
1) xaml
<Window x:Class="WpfTutorialSamples.ListBox_control.ListBoxSample"
        xmlns="http://schemas.microsoft.com/winfx/2006/xaml/presentation"
        xmlns:x="http://schemas.microsoft.com/winfx/2006/xaml"
        Title="ListBoxSample" Height="120" Width="200">
    <Grid Margin="10">
		<ListBox>
			<ListBoxItem>ListBox Item #1</ListBoxItem>
			<ListBoxItem>ListBox Item #2</ListBoxItem>
			<ListBoxItem>ListBox Item #3</ListBoxItem>
		</ListBox>
	</Grid>
</Window>
2) 결과
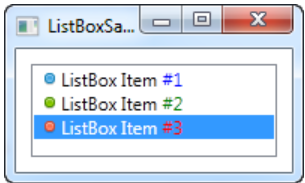
[예제 2]
- ListBox의 ListBoxItem 속성은 Content이기 때문에 다른 속성들을 추가해 줄 수 있음
1) xaml
<Window x:Class="WpfTutorialSamples.ListBox_control.ListBoxSample"
        xmlns="http://schemas.microsoft.com/winfx/2006/xaml/presentation"
        xmlns:x="http://schemas.microsoft.com/winfx/2006/xaml"
        Title="ListBoxSample" Height="120" Width="200">
	<Grid Margin="10">
		<ListBox>

			<!--Content 1-->
			<ListBoxItem>
				<StackPanel Orientation="Horizontal">
					<Image Source="/WpfTutorialSamples;component/Images/bullet_blue.png" />
					<TextBlock>ListBox Item #1</TextBlock>
				</StackPanel>
			</ListBoxItem>

			<!--Content 2-->
			<ListBoxItem>
				<StackPanel Orientation="Horizontal">
					<Image Source="/WpfTutorialSamples;component/Images/bullet_green.png" />
					<TextBlock>ListBox Item #2</TextBlock>
				</StackPanel>
			</ListBoxItem>

			<!--Content 3-->
			<ListBoxItem>
				<StackPanel Orientation="Horizontal">
					<Image Source="/WpfTutorialSamples;component/Images/bullet_red.png" />
					<TextBlock>ListBox Item #3</TextBlock>
				</StackPanel>
			</ListBoxItem>

		</ListBox>
	</Grid>
</Window>
2) 결과
- 각 ListBoxItem들에 다른 이미지나 색깔 값 같은 속성들을 넣을 수 있었다.
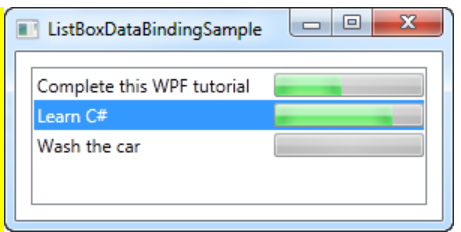
[예제 3]
- ListBox 데이터 바인딩
1) xaml
<Window x:Class="WpfTutorialSamples.ListBox_control.ListBoxDataBindingSample"
        xmlns="http://schemas.microsoft.com/winfx/2006/xaml/presentation"
        xmlns:x="http://schemas.microsoft.com/winfx/2006/xaml"
        Title="ListBoxDataBindingSample" Height="150" Width="300">
    <Grid Margin="10">
		<ListBox Name="lbTodoList" HorizontalContentAlignment="Stretch">
			<ListBox.ItemTemplate>
				<DataTemplate>
					<Grid Margin="0,2">
						<Grid.ColumnDefinitions>
							<ColumnDefinition Width="*" />
							<ColumnDefinition Width="100" />
						</Grid.ColumnDefinitions>

						<TextBlock Text="{Binding Title}" />
						<ProgressBar Grid.Column="1" Minimum="0" Maximum="100" Value="{Binding Completion}" />
					</Grid>
				</DataTemplate>
			</ListBox.ItemTemplate>
		</ListBox>
	</Grid>
</Window>
2) code-behind
using System;
using System.Windows;
using System.Collections.Generic;

namespace WpfTutorialSamples.ListBox_control
{
	public partial class ListBoxDataBindingSample : Window
	{
		public ListBoxDataBindingSample()
		{
			InitializeComponent();

			List<TodoItem> items = new List<TodoItem>();
			items.Add(new TodoItem() { Title = "Complete this WPF tutorial", Completion = 45 });
			items.Add(new TodoItem() { Title = "Learn C#", Completion = 80 });
			items.Add(new TodoItem() { Title = "Wash the car", Completion = 0 });

			lbTodoList.ItemsSource = items;
		}
	}

	public class TodoItem
	{
		public string Title { get; set; }
		public int Completion { get; set; }
	}
}
3) 결과
- ListBox로 데이터 바인딩 작업을 해보았다.
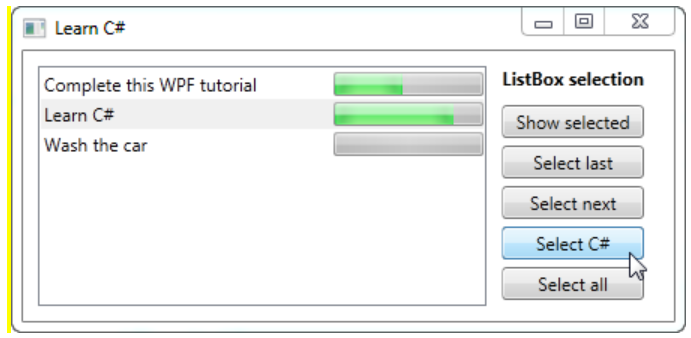
[예제 4]
- ListBox 선택 작업
1) xaml
<Window x:Class="WpfTutorialSamples.ListBox_control.ListBoxSelectionSample"
        xmlns="http://schemas.microsoft.com/winfx/2006/xaml/presentation"
        xmlns:x="http://schemas.microsoft.com/winfx/2006/xaml"
        Title="ListBoxSelectionSample" Height="250" Width="450">
	<DockPanel Margin="10">
		<StackPanel DockPanel.Dock="Right" Margin="10,0">
			<StackPanel.Resources>
				<Style TargetType="Button">
					<Setter Property="Margin" Value="0,0,0,5" />
				</Style>
			</StackPanel.Resources>

			<TextBlock FontWeight="Bold" Margin="0,0,0,10">ListBox selection</TextBlock>

			<Button Name="btnShowSelectedItem" Click="btnShowSelectedItem_Click">Show selected</Button>
			<Button Name="btnSelectLast" Click="btnSelectLast_Click">Select last</Button>
			<Button Name="btnSelectNext" Click="btnSelectNext_Click">Select next</Button>
			<Button Name="btnSelectCSharp" Click="btnSelectCSharp_Click">Select C#</Button>
			<Button Name="btnSelectAll" Click="btnSelectAll_Click">Select all</Button>

		</StackPanel>

		<ListBox Name="lbTodoList" HorizontalContentAlignment="Stretch" SelectionMode="Extended" SelectionChanged="lbTodoList_SelectionChanged">
			<ListBox.ItemTemplate>
				<DataTemplate>
					<Grid Margin="0,2">
						<Grid.ColumnDefinitions>
							<ColumnDefinition Width="*" />
							<ColumnDefinition Width="100" />
						</Grid.ColumnDefinitions>

						<TextBlock Text="{Binding Title}" />
						<ProgressBar Grid.Column="1" Minimum="0" Maximum="100" Value="{Binding Completion}" />
					</Grid>
				</DataTemplate>
			</ListBox.ItemTemplate>
		</ListBox>
	</DockPanel>
</Window>
2) code-behind
using System;
using System.Windows;
using System.Collections.Generic;

namespace WpfTutorialSamples.ListBox_control
{
	public partial class ListBoxSelectionSample : Window
	{
		public ListBoxSelectionSample()
		{
			InitializeComponent();

			List<TodoItem> items = new List<TodoItem>();
			items.Add(new TodoItem() { Title = "Complete this WPF tutorial", Completion = 45 });
			items.Add(new TodoItem() { Title = "Learn C#", Completion = 80 });
			items.Add(new TodoItem() { Title = "Wash the car", Completion = 0 });

			lbTodoList.ItemsSource = items;
		}

		private void lbTodoList_SelectionChanged(object sender, System.Windows.Controls.SelectionChangedEventArgs e)
		{
			// 항목이 선택되면 선택된 해당 항목으로 타이틀 변경
			if(lbTodoList.SelectedItem != null)
				this.Title = (lbTodoList.SelectedItem as TodoItem).Title;
		}

		private void btnShowSelectedItem_Click(object sender, RoutedEventArgs e)
		{
			// 선택한 항목을 보여줌
			foreach(object o in lbTodoList.SelectedItems)
				MessageBox.Show((o as TodoItem).Title);
		}

		private void btnSelectLast_Click(object sender, RoutedEventArgs e)
		{
			// 마지막 항목을 선택
			lbTodoList.SelectedIndex = lbTodoList.Items.Count - 1;
		}

		private void btnSelectNext_Click(object sender, RoutedEventArgs e)
		{
			// 다음 항목을 이동
			int nextIndex = 0;
			if((lbTodoList.SelectedIndex >= 0) && (lbTodoList.SelectedIndex < (lbTodoList.Items.Count - 1)))
				nextIndex = lbTodoList.SelectedIndex + 1;
			lbTodoList.SelectedIndex = nextIndex;
		}

		private void btnSelectCSharp_Click(object sender, RoutedEventArgs e)
		{
			// C#이라는 단어가 있는 항목으로 이동
			foreach(object o in lbTodoList.Items)
			{
				if((o is TodoItem) && ((o as TodoItem).Title.Contains("C#")))
				{
					lbTodoList.SelectedItem = o;
					break;
				}
			}
		}

		private void btnSelectAll_Click(object sender, RoutedEventArgs e)
		{
			// 모두 선택
			foreach(object o in lbTodoList.Items)
				lbTodoList.SelectedItems.Add(o);
		}
	}

	public class TodoItem
	{
		public string Title { get; set; }
		public int Completion { get; set; }
	}
}
3) 결과
3. ComboBox
[예제 1]
- ComboBox의 기본 형태
- ComboBoxItem도 하나의 Content이므로 다른 속성들을 넣어줄 수 있음.
1) xaml
<Window x:Class="WpfTutorialSamples.ComboBox_control.ComboBoxCustomContentSample"
        xmlns="http://schemas.microsoft.com/winfx/2006/xaml/presentation"
        xmlns:x="http://schemas.microsoft.com/winfx/2006/xaml"
        Title="ComboBoxCustomContentSample" Height="150" Width="200">
    <StackPanel Margin="10">
        <ComboBox>

			<!--Content 1-->
            <ComboBoxItem>
                <StackPanel Orientation="Horizontal">
                    <Image Source="/WpfTutorialSamples;component/Images/bullet_red.png" />
                    <TextBlock Foreground="Red">Red</TextBlock>
                </StackPanel>
            </ComboBoxItem>

			<!--Content 2-->
            <ComboBoxItem>
                <StackPanel Orientation="Horizontal">
                    <Image Source="/WpfTutorialSamples;component/Images/bullet_green.png" />
                    <TextBlock Foreground="Green">Green</TextBlock>
                </StackPanel>
            </ComboBoxItem>

			<!--Content 3-->
            <ComboBoxItem>
                <StackPanel Orientation="Horizontal">
                    <Image Source="/WpfTutorialSamples;component/Images/bullet_blue.png" />
                    <TextBlock Foreground="Blue">Blue</TextBlock>
                </StackPanel>
            </ComboBoxItem>

        </ComboBox>
    </StackPanel>
</Window>
2) 결과

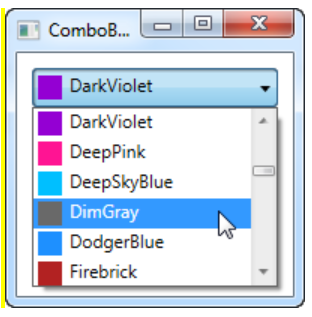
[예제 2]
- ComboBox 데이터 바인딩
1) xaml
<Window x:Class="WpfTutorialSamples.ComboBox_control.ComboBoxDataBindingSample"
        xmlns="http://schemas.microsoft.com/winfx/2006/xaml/presentation"
        xmlns:x="http://schemas.microsoft.com/winfx/2006/xaml"
        Title="ComboBoxDataBindingSample" Height="200" Width="200">
    <StackPanel Margin="10">
        <ComboBox Name="cmbColors">
            <ComboBox.ItemTemplate>
                <DataTemplate>
                    <StackPanel Orientation="Horizontal">
                        <Rectangle Fill="{Binding Name}" Width="16" Height="16" Margin="0,2,5,2" />
                        <TextBlock Text="{Binding Name}" />
                    </StackPanel>
                </DataTemplate>
            </ComboBox.ItemTemplate>
        </ComboBox>
    </StackPanel>
</Window>
2) code-behind
using System;
using System.Collections.Generic;
using System.Windows;
using System.Windows.Media;

namespace WpfTutorialSamples.ComboBox_control
{
	public partial class ComboBoxDataBindingSample : Window
	{
		public ComboBoxDataBindingSample()
		{
			InitializeComponent();

			// 데이터 연결 - 모든 색상 목록을 가져옴
			cmbColors.ItemsSource = typeof(Colors).GetProperties();
		}
	}
}
3) 결과
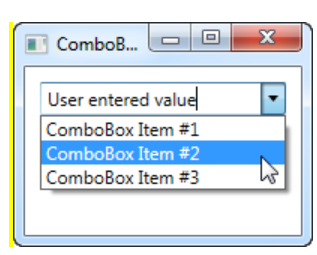
[예제 3]
- ComboBox는 사용자가 항목에 직접 값을 입력할 수 있음
- IsEditable = "True"로 변경
1) xaml
<Window x:Class="WpfTutorialSamples.ComboBox_control.ComboBoxEditableSample"
        xmlns="http://schemas.microsoft.com/winfx/2006/xaml/presentation"
        xmlns:x="http://schemas.microsoft.com/winfx/2006/xaml"
        Title="ComboBoxEditableSample" Height="150" Width="200">
    <StackPanel Margin="10">
        <ComboBox IsEditable="True"> <!--IsEditable을 True로 바꾸면 사용자가 편집가능-->
            <ComboBoxItem>ComboBox Item #1</ComboBoxItem>
            <ComboBoxItem>ComboBox Item #2</ComboBoxItem>
            <ComboBoxItem>ComboBox Item #3</ComboBoxItem>
        </ComboBox>
    </StackPanel>
</Window>
2) 결과
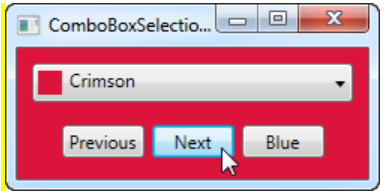
[예제 4]
- ComboBox 선택 작업
1) xaml
<Window x:Class="WpfTutorialSamples.ComboBox_control.ComboBoxSelectionSample"
        xmlns="http://schemas.microsoft.com/winfx/2006/xaml/presentation"
        xmlns:x="http://schemas.microsoft.com/winfx/2006/xaml"
        Title="ComboBoxSelectionSample" Height="125" Width="250">
    <StackPanel Margin="10">

        <ComboBox Name="cmbColors" SelectionChanged="cmbColors_SelectionChanged">
            <ComboBox.ItemTemplate>
                <DataTemplate>
                    <StackPanel Orientation="Horizontal">
                        <Rectangle Fill="{Binding Name}" Width="16" Height="16" Margin="0,2,5,2" />
                        <TextBlock Text="{Binding Name}" />
                    </StackPanel>
                </DataTemplate>
            </ComboBox.ItemTemplate>
        </ComboBox>

        <WrapPanel Margin="15" HorizontalAlignment="Center">
            <Button Name="btnPrevious" Click="btnPrevious_Click" Width="55">Previous</Button>
            <Button Name="btnNext" Click="btnNext_Click" Margin="5,0" Width="55">Next</Button>
            <Button Name="btnBlue" Click="btnBlue_Click" Width="55">Blue</Button>
        </WrapPanel>

    </StackPanel>
</Window>
2) code-behind
using System;
using System.Collections.Generic;
using System.Reflection;
using System.Windows;
using System.Windows.Media;

namespace WpfTutorialSamples.ComboBox_control
{
	public partial class ComboBoxSelectionSample : Window
	{
		public ComboBoxSelectionSample()
		{
			InitializeComponent();
			cmbColors.ItemsSource = typeof(Colors).GetProperties();
		}

		private void btnPrevious_Click(object sender, RoutedEventArgs e)
		{
			if(cmbColors.SelectedIndex > 0)
				cmbColors.SelectedIndex = cmbColors.SelectedIndex - 1;
		}

		private void btnNext_Click(object sender, RoutedEventArgs e)
		{
			if(cmbColors.SelectedIndex < cmbColors.Items.Count-1)
				cmbColors.SelectedIndex = cmbColors.SelectedIndex + 1;
		}

		private void btnBlue_Click(object sender, RoutedEventArgs e)
		{
			cmbColors.SelectedItem = typeof(Colors).GetProperty("Blue");
		}

		private void cmbColors_SelectionChanged(object sender, System.Windows.Controls.SelectionChangedEventArgs e)
		{
			// 선택한 색으로 배경색을 바꿔줌
			Color selectedColor = (Color)(cmbColors.SelectedItem as PropertyInfo).GetValue(null, null);
			this.Background = new SolidColorBrush(selectedColor);
		}
	}
}
3) 결과
- 선택한 색으로 바탕색을 바꿀 수 있었다.
4. ListView
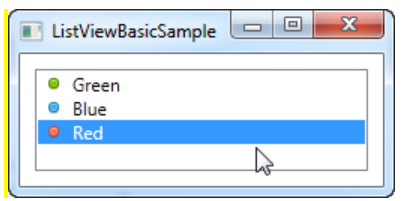
[예제 1]
- ListView 기본 형태
- Content의 특징을 가짐
1) xaml
<Window x:Class="WpfTutorialSamples.ListView_control.ListViewBasicSample"
        xmlns="http://schemas.microsoft.com/winfx/2006/xaml/presentation"
        xmlns:x="http://schemas.microsoft.com/winfx/2006/xaml"
        Title="ListViewBasicSample" Height="200" Width="200">
    <Grid>
		<ListView Margin="10">

			<!--Content 1-->
			<ListViewItem>
				<StackPanel Orientation="Horizontal">
					<Image Source="/WpfTutorialSamples;component/Images/bullet_green.png" Margin="0,0,5,0" />
					<TextBlock>Green</TextBlock>
				</StackPanel>
			</ListViewItem>

			<!--Content 2-->
			<ListViewItem>
				<StackPanel Orientation="Horizontal">
					<Image Source="/WpfTutorialSamples;component/Images/bullet_blue.png" Margin="0,0,5,0" />
					<TextBlock>Blue</TextBlock>
				</StackPanel>
			</ListViewItem>

			<!--Content 3-->
			<ListViewItem IsSelected="True">
				<StackPanel Orientation="Horizontal">
					<Image Source="/WpfTutorialSamples;component/Images/bullet_red.png" Margin="0,0,5,0" />
					<TextBlock>Red</TextBlock>
				</StackPanel>
			</ListViewItem>

		</ListView>
	</Grid>
</Window>
2) 결과
[예제 2]
- ListView 데이터 바인딩
- 표시방법에 대한 재정의가 필요
1) xaml
<Window x:Class="WpfTutorialSamples.ListView_control.ListViewDataBindingSample"
        xmlns="http://schemas.microsoft.com/winfx/2006/xaml/presentation"
        xmlns:x="http://schemas.microsoft.com/winfx/2006/xaml"
        Title="ListViewDataBindingSample" Height="300" Width="300">
    <Grid>
		<ListView Margin="10" Name="lvDataBinding"></ListView>
	</Grid>
</Window>
2) code-behind
using System;
using System.Collections.Generic;
using System.Windows;

namespace WpfTutorialSamples.ListView_control
{
	public partial class ListViewDataBindingSample : Window
	{
		public ListViewDataBindingSample()
		{
			InitializeComponent();

			List<User> items = new List<User>();
			items.Add(new User() { Name = "John Doe", Age = 42 });
			items.Add(new User() { Name = "Jane Doe", Age = 39 });
			items.Add(new User() { Name = "Sammy Doe", Age = 13 });

			lvDataBinding.ItemsSource = items;
		}
	}

	public class User
{
	public string Name { get; set; }

	public int Age { get; set; }

	public override string ToString()
	{
		// ToString()에 대한 재정의
		return this.Name + ", " + this.Age + " years old";
	}
}
}
3) 결과
- 처음은 ToString에 대한 재정의를 하지 않은 경우이고 두번째가 재정의를 한 경우이다.
- 재정의를 하지 않으면 해당 유형의 이름으로 출력된다.


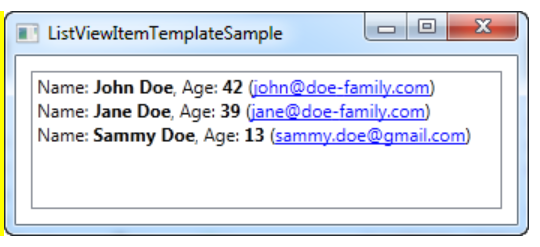
[예제 3]
- ItemTemplate이 포함된 ListView
1) xaml
<Window x:Class="WpfTutorialSamples.ListView_control.ListViewItemTemplateSample"
        xmlns="http://schemas.microsoft.com/winfx/2006/xaml/presentation"
        xmlns:x="http://schemas.microsoft.com/winfx/2006/xaml"
        Title="ListViewItemTemplateSample" Height="150" Width="350">
    <Grid>
		<ListView Margin="10" Name="lvDataBinding">
			<ListView.ItemTemplate>
				<DataTemplate>
					<WrapPanel>
						<TextBlock Text="Name: " />
						<TextBlock Text="{Binding Name}" FontWeight="Bold" />
						<TextBlock Text=", " />
						<TextBlock Text="Age: " />
						<TextBlock Text="{Binding Age}" FontWeight="Bold" />
						<TextBlock Text=" (" />
						<TextBlock Text="{Binding Mail}" TextDecorations="Underline" Foreground="Blue" Cursor="Hand" />
						<TextBlock Text=")" />
					</WrapPanel>
				</DataTemplate>
			</ListView.ItemTemplate>
		</ListView>
	</Grid>
</Window>
2) code-behind
using System;
using System.Collections.Generic;
using System.Windows;

namespace WpfTutorialSamples.ListView_control
{
	public partial class ListViewItemTemplateSample : Window
	{
		public ListViewItemTemplateSample()
		{
			InitializeComponent();

			List<User> items = new List<User>();
			items.Add(new User() { Name = "John Doe", Age = 42, Mail = "john@doe-family.com" });
			items.Add(new User() { Name = "Jane Doe", Age = 39, Mail = "jane@doe-family.com" });
			items.Add(new User() { Name = "Sammy Doe", Age = 13, Mail = "sammy.doe@gmail.com" });

			lvDataBinding.ItemsSource = items;
		}
	}

	public class User
	{
		public string Name { get; set; }

		public int Age { get; set; }

		public string Mail { get; set; }
	}
}
3) 결과
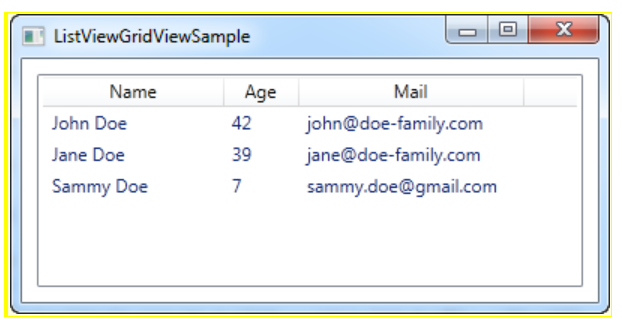
[예제 4]
- GridView가 있는 ListView
1) xaml
<Window x:Class="WpfTutorialSamples.ListView_control.ListViewGridViewSample"
        xmlns="http://schemas.microsoft.com/winfx/2006/xaml/presentation"
        xmlns:x="http://schemas.microsoft.com/winfx/2006/xaml"
        Title="ListViewGridViewSample" Height="200" Width="400">
    <Grid>
		<ListView Margin="10" Name="lvUsers">
			<ListView.View>
				<GridView>
					<GridViewColumn Header="Name" Width="120" DisplayMemberBinding="{Binding Name}" />
					<GridViewColumn Header="Age" Width="50" DisplayMemberBinding="{Binding Age}" />
					<GridViewColumn Header="Mail" Width="150" DisplayMemberBinding="{Binding Mail}" />
				</GridView>
			</ListView.View>
		</ListView>
	</Grid>
</Window>
2) code-behind
using System;
using System.Collections.Generic;
using System.Windows;

namespace WpfTutorialSamples.ListView_control
{
	public partial class ListViewGridViewSample : Window
	{
		public ListViewGridViewSample()
		{
			InitializeComponent();

			List<User> items = new List<User>();
			items.Add(new User() { Name = "John Doe", Age = 42, Mail = "john@doe-family.com" });
			items.Add(new User() { Name = "Jane Doe", Age = 39, Mail = "jane@doe-family.com" });
			items.Add(new User() { Name = "Sammy Doe", Age = 7, Mail = "sammy.doe@gmail.com" });

			lvUsers.ItemsSource = items;
		}
	}

	public class User
	{
		public string Name { get; set; }

		public int Age { get; set; }

		public string Mail { get; set; }
	}
}
3) 결과
- GridView를 이용해 보기 쉬운 레이아웃을 사용할 수 있었다.
4) 추가
- CellTemplate을 이용해 해당 Content의 속성을 바꿀 수 있다.
<GridView>
	<GridViewColumn Header="Name" Width="120" DisplayMemberBinding="{Binding Name}" />
	<GridViewColumn Header="Age" Width="50" DisplayMemberBinding="{Binding Age}" />
	<GridViewColumn Header="Mail" Width="150">
		<GridViewColumn.CellTemplate>
			<DataTemplate>
				<TextBlock Text="{Binding Mail}" TextDecorations="Underline" Foreground="Blue" Cursor="Hand" />
			</DataTemplate>
		</GridViewColumn.CellTemplate>
	</GridViewColumn>
</GridView>
5) 추가 2
- Style을 지정해 왼쪽 정렬과 같이 정렬방식을 변경 할 수 있다.
- Window.Resources 사이에 정의하면 전역으로 사용할 수 있고, ListView.Resources 사이에 정의하면 로컬로 사용 할 수 있다.
<Style TargetType="{x:Type GridViewColumnHeader}">
	<Setter Property="HorizontalContentAlignment" Value="Left" />
</Style>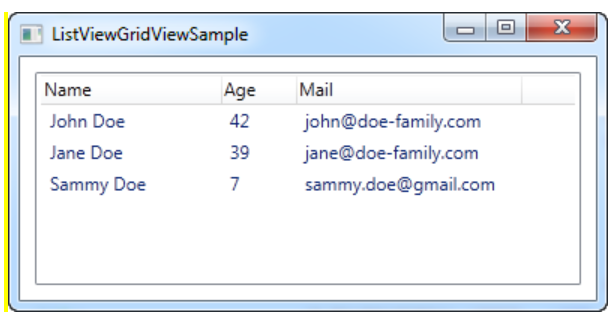
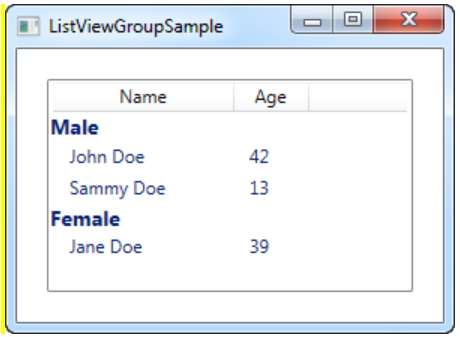
[예제 5]
- ListView 그룹화
1) xaml
<Window x:Class="WpfTutorialSamples.ListView_control.ListViewGroupSample"
        xmlns="http://schemas.microsoft.com/winfx/2006/xaml/presentation"
        xmlns:x="http://schemas.microsoft.com/winfx/2006/xaml"
        Title="ListViewGroupSample" Height="300" Width="300">
    <Grid Margin="10">

        <ListView Name="lvUsers">
            <ListView.View>
                <GridView>
                    <GridViewColumn Header="Name" Width="120" DisplayMemberBinding="{Binding Name}" />
                    <GridViewColumn Header="Age" Width="50" DisplayMemberBinding="{Binding Age}" />
                </GridView>
            </ListView.View>

            <ListView.GroupStyle>
                <GroupStyle>
                    <GroupStyle.HeaderTemplate>
                        <DataTemplate>
                            <TextBlock FontWeight="Bold" FontSize="14" Text="{Binding Name}"/>
                        </DataTemplate>
                    </GroupStyle.HeaderTemplate>
                </GroupStyle>
            </ListView.GroupStyle>

        </ListView>
    </Grid>
</Window>
2) code-behind
using System;
using System.Collections.Generic;
using System.Windows;
using System.Windows.Data;

namespace WpfTutorialSamples.ListView_control
{
	public partial class ListViewGroupSample : Window
	{
		public ListViewGroupSample()
		{
			InitializeComponent();

			List<User> items = new List<User>();
			items.Add(new User() { Name = "John Doe", Age = 42, Sex = SexType.Male });
			items.Add(new User() { Name = "Jane Doe", Age = 39, Sex = SexType.Female });
			items.Add(new User() { Name = "Sammy Doe", Age = 13, Sex = SexType.Male });

			lvUsers.ItemsSource = items;

			CollectionView view = (CollectionView)CollectionViewSource.GetDefaultView(lvUsers.ItemsSource);

			// 그룹 생성
			PropertyGroupDescription groupDescription = new PropertyGroupDescription("Sex");
			view.GroupDescriptions.Add(groupDescription); // 그룹 추가
		}
	}

	public enum SexType { Male, Female };

	public class User
	{
		public string Name { get; set; }

		public int Age { get; set; }

		public string Mail { get; set; }

		public SexType Sex { get; set; }
	}
}
3) 결과
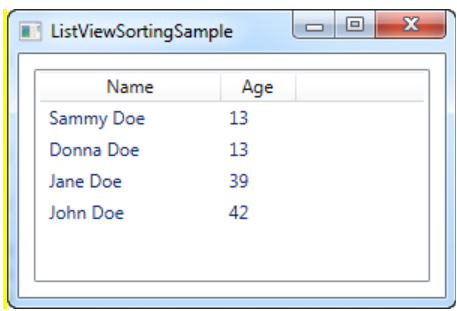
[예제 6]
- ListView 정렬
- code-behind에서 정렬을 해준다.
1) xaml
<Window x:Class="WpfTutorialSamples.ListView_control.ListViewSortingSample"
        xmlns="http://schemas.microsoft.com/winfx/2006/xaml/presentation"
        xmlns:x="http://schemas.microsoft.com/winfx/2006/xaml"
        Title="ListViewSortingSample" Height="200" Width="300">
    <Grid Margin="10">
        <ListView Name="lvUsers">
            <ListView.View>
                <GridView>
                    <GridViewColumn Header="Name" Width="120" DisplayMemberBinding="{Binding Name}" />
                    <GridViewColumn Header="Age" Width="50" DisplayMemberBinding="{Binding Age}" />
                </GridView>
            </ListView.View>
        </ListView>
    </Grid>
</Window>
2) code-behind
using System;
using System.Collections.Generic;
using System.ComponentModel;
using System.Windows;
using System.Windows.Data;

namespace WpfTutorialSamples.ListView_control
{
	public partial class ListViewSortingSample : Window
	{
		public ListViewSortingSample()
		{
			InitializeComponent();

			List<User> items = new List<User>();
			items.Add(new User() { Name = "John Doe", Age = 42 });
			items.Add(new User() { Name = "Jane Doe", Age = 39 });
			items.Add(new User() { Name = "Sammy Doe", Age = 13 });
			items.Add(new User() { Name = "Donna Doe", Age = 13 });

			lvUsers.ItemsSource = items;

			// 현재 뷰에 접근
			CollectionView view = (CollectionView)CollectionViewSource.GetDefaultView(lvUsers.ItemsSource);

			// 뷰의 Age 속성을 오름차순으로 정렬
			view.SortDescriptions.Add(new SortDescription("Age", ListSortDirection.Ascending));
		}
	}

	public class User
	{
		public string Name { get; set; }

		public int Age { get; set; }
	}
}
3) 결과
4) 다중 정렬
- 정렬할 우선순위에 맞게 추가해주면 된다.
CollectionView view = (CollectionView)CollectionViewSource.GetDefaultView(lvUsers.ItemsSource);
view.SortDescriptions.Add(new SortDescription("Age", ListSortDirection.Ascending));
view.SortDescriptions.Add(new SortDescription("Name", ListSortDirection.Ascending));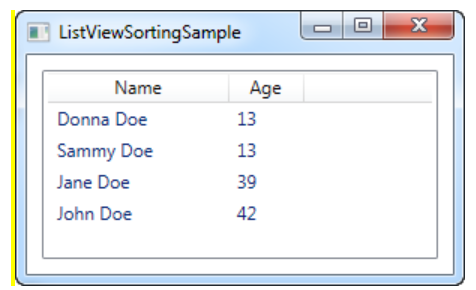
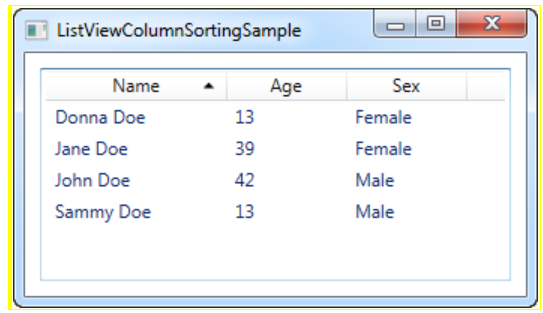
[예제 7]
- ListView 열 정렬
1) xaml
<Window x:Class="WpfTutorialSamples.ListView_control.ListViewColumnSortingSample"
        xmlns="http://schemas.microsoft.com/winfx/2006/xaml/presentation"
        xmlns:x="http://schemas.microsoft.com/winfx/2006/xaml"
        Title="ListViewColumnSortingSample" Height="200" Width="350">
    <Grid Margin="10">
        <ListView Name="lvUsers">
            <ListView.View>
                <GridView>

                    <GridViewColumn Width="120" DisplayMemberBinding="{Binding Name}">
                        <GridViewColumn.Header>
                            <GridViewColumnHeader Tag="Name" Click="lvUsersColumnHeader_Click">Name</GridViewColumnHeader>
                        </GridViewColumn.Header>
                    </GridViewColumn>

                    <GridViewColumn Width="80" DisplayMemberBinding="{Binding Age}">
                        <GridViewColumn.Header>
                            <GridViewColumnHeader Tag="Age" Click="lvUsersColumnHeader_Click">Age</GridViewColumnHeader>
                        </GridViewColumn.Header>
                    </GridViewColumn>

                    <GridViewColumn Width="80" DisplayMemberBinding="{Binding Sex}">
                        <GridViewColumn.Header>
                            <GridViewColumnHeader Tag="Sex" Click="lvUsersColumnHeader_Click">Sex</GridViewColumnHeader>
                        </GridViewColumn.Header>
                    </GridViewColumn>

                </GridView>
            </ListView.View>
        </ListView>
    </Grid>
</Window>
2) code-behind
using System;
using System.Collections.Generic;
using System.ComponentModel;
using System.Windows;
using System.Windows.Controls;
using System.Windows.Data;
using System.Windows.Documents;
using System.Windows.Media;

namespace WpfTutorialSamples.ListView_control
{
	public partial class ListViewColumnSortingSample : Window
	{
		private GridViewColumnHeader listViewSortCol = null; // 정렬의 기준이되는 열
		private SortAdorner listViewSortAdorner = null; // 정렬 기준 표시 도형

		public ListViewColumnSortingSample()
		{
			InitializeComponent();

			List<User> items = new List<User>();
			items.Add(new User() { Name = "John Doe", Age = 42, Sex = SexType.Male });
			items.Add(new User() { Name = "Jane Doe", Age = 39, Sex = SexType.Female });
			items.Add(new User() { Name = "Sammy Doe", Age = 13, Sex = SexType.Male });
			items.Add(new User() { Name = "Donna Doe", Age = 13, Sex = SexType.Female });

			lvUsers.ItemsSource = items;
		}

		// 사용자가 열을 클릭할 때 발생하는 이벤트
		private void lvUsersColumnHeader_Click(object sender, RoutedEventArgs e)
		{
			GridViewColumnHeader column = (sender as GridViewColumnHeader); // 사용자가 선택한 열
			string sortBy = column.Tag.ToString(); // 열의 정렬 방식

			// 해당 열을 기준으로 정렬되었는지 확인
			if(listViewSortCol != null)
			{
				AdornerLayer.GetAdornerLayer(listViewSortCol).Remove(listViewSortAdorner); // 표시 도형 제거
				lvUsers.Items.SortDescriptions.Clear(); // 정렬에 대한 설명 초기화
			}

			ListSortDirection newDir = ListSortDirection.Ascending; // 정렬 방향(기본 오름차순)

			// 이미 오름차순으로 정렬되어 있는 경우, 내림차순으로 정렬
			if(listViewSortCol == column && listViewSortAdorner.Direction == newDir)
				newDir = ListSortDirection.Descending;

			// 적용
			listViewSortCol = column;
			listViewSortAdorner = new SortAdorner(listViewSortCol, newDir);
			AdornerLayer.GetAdornerLayer(listViewSortCol).Add(listViewSortAdorner);
			lvUsers.Items.SortDescriptions.Add(new SortDescription(sortBy, newDir));
		}
	}

	public enum SexType { Male, Female };

	public class User
	{
		public string Name { get; set; }

		public int Age { get; set; }

		public string Mail { get; set; }

		public SexType Sex { get; set; }
	}

	// 정렬 방향에 따라 위쪽이나 아래쪽 삼각형을 그림
	public class SortAdorner : Adorner
	{
		// 위쪽 삼각형
		private static Geometry ascGeometry =
			Geometry.Parse("M 0 4 L 3.5 0 L 7 4 Z");

		// 아래쪽 삼각형
		private static Geometry descGeometry =
			Geometry.Parse("M 0 0 L 3.5 4 L 7 0 Z");

		public ListSortDirection Direction { get; private set; }

		public SortAdorner(UIElement element, ListSortDirection dir) : base(element)
		{
			this.Direction = dir;
		}

		protected override void OnRender(DrawingContext drawingContext)
		{
			base.OnRender(drawingContext);

			if(AdornedElement.RenderSize.Width < 20)
				return;

			TranslateTransform transform = new TranslateTransform
				(
					AdornedElement.RenderSize.Width - 15,
					(AdornedElement.RenderSize.Height - 5) / 2
				);

			drawingContext.PushTransform(transform);

			Geometry geometry = ascGeometry;

			if(this.Direction == ListSortDirection.Descending)
				geometry = descGeometry;

			drawingContext.DrawGeometry(Brushes.Black, null, geometry);
			drawingContext.Pop();
		}
	}
}
3) 결과
- 각 속성열을 눌러 오름차순 혹은 내림차순으로 정렬 가능
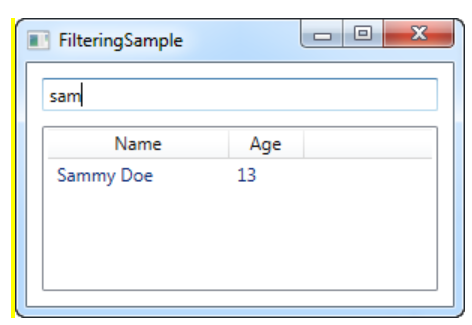
[예제 8]
- ListView 필터링
1) xaml
<Window x:Class="WpfTutorialSamples.ListView_control.FilteringSample"
        xmlns="http://schemas.microsoft.com/winfx/2006/xaml/presentation"
        xmlns:x="http://schemas.microsoft.com/winfx/2006/xaml"
        Title="FilteringSample" Height="200" Width="300">
    <DockPanel Margin="10">
        <TextBox DockPanel.Dock="Top" Margin="0,0,0,10" Name="txtFilter" TextChanged="txtFilter_TextChanged" />
        <ListView Name="lvUsers">
            <ListView.View>
                <GridView>
                    <GridViewColumn Header="Name" Width="120" DisplayMemberBinding="{Binding Name}" />
                    <GridViewColumn Header="Age" Width="50" DisplayMemberBinding="{Binding Age}" />
                </GridView>
            </ListView.View>
        </ListView>
    </DockPanel>
</Window>
2) code-behind
using System;
using System.Collections.Generic;
using System.Windows;
using System.Windows.Data;

namespace WpfTutorialSamples.ListView_control
{
	public partial class FilteringSample : Window
	{
		public FilteringSample()
		{
			InitializeComponent();

			List<User> items = new List<User>();
			items.Add(new User() { Name = "John Doe", Age = 42 });
			items.Add(new User() { Name = "Jane Doe", Age = 39 });
			items.Add(new User() { Name = "Sammy Doe", Age = 13 });
			items.Add(new User() { Name = "Donna Doe", Age = 13 });

			lvUsers.ItemsSource = items;

			CollectionView view = (CollectionView)CollectionViewSource.GetDefaultView(lvUsers.ItemsSource);
			view.Filter = UserFilter;
		}

		private bool UserFilter(object item)
		{
			if(String.IsNullOrEmpty(txtFilter.Text))
				return true;
			else
				return ((item as User).Name.IndexOf(txtFilter.Text, StringComparison.OrdinalIgnoreCase) >= 0);
		}

		private void txtFilter_TextChanged(object sender, System.Windows.Controls.TextChangedEventArgs e)
		{
			CollectionViewSource.GetDefaultView(lvUsers.ItemsSource).Refresh();
		}
	}

	public enum SexType { Male, Female };

	public class User
	{
		public string Name { get; set; }

		public int Age { get; set; }

		public string Mail { get; set; }

		public SexType Sex { get; set; }
	}
}
3) 결과