MVVM 패턴을 활용해 WPF로 간단한 학생 리스트를 만들어 보았다.
0. 파일 구조
- 파일의 구조는 아래와 같다.

1. View 생성
[xaml]
<Window
        xmlns="http://schemas.microsoft.com/winfx/2006/xaml/presentation"
        xmlns:x="http://schemas.microsoft.com/winfx/2006/xaml"
        xmlns:d="http://schemas.microsoft.com/expression/blend/2008"
        xmlns:mc="http://schemas.openxmlformats.org/markup-compatibility/2006"
        xmlns:local="clr-namespace:WPF_MVVM_EX_App"
        xmlns:ViewModel="clr-namespace:WPF_MVVM_EX_App.ViewModel" x:Class="WPF_MVVM_EX_App.MainWindow"
        mc:Ignorable="d"
        Title="MainWindow" Height="450" Width="585">
    <Window.DataContext>
        <ViewModel:StudentViewModel/>
    </Window.DataContext>
    <Grid Margin="0,0,3.4,0">

        <Grid.ColumnDefinitions>
            <ColumnDefinition/>
            <ColumnDefinition Width="0*"/>
        </Grid.ColumnDefinitions>

        <DataGrid x:Name="datagrid1"
                  ItemsSource="{Binding ShowStudents, Mode=TwoWay}"
                  SelectedItem="{Binding SelectedStudent, Mode=TwoWay}"
                  SelectionUnit="FullRow"
                  Margin="10,10,189.2,10"/>

        <Border DataContext="{Binding SelectedStudent}"
                Margin="0,10,8.2,10"
                HorizontalAlignment="Right"
                Width="162"
                Background="#66FFFFFF">

            <StackPanel Margin="10">
                <TextBlock Text="Student"
                           FontWeight="Bold"
                           FontSize="16"
                           HorizontalAlignment="Center"
                           Margin="10"/>
                <TextBlock Text="Grade"/>
                <TextBox Text="{Binding Grade, Mode=TwoWay}"/>
                <TextBlock Text="Cclass"/>
                <TextBox Text="{Binding Cclass, Mode=TwoWay}"/>
                <TextBlock Text="No"/>
                <TextBox Text="{Binding No, Mode=TwoWay}"/>
                <TextBlock Text="Name"/>
                <TextBox Text="{Binding Name, Mode=TwoWay}"/>
                <TextBlock Text="Score"/>
                <TextBox Text="{Binding Score, Mode=TwoWay}"/>
            </StackPanel>

        </Border>

        <Button Command="{Binding ReadCommand }"
                Content="Read"
                HorizontalAlignment="Left"
                VerticalAlignment="Top"
                Width="75" Height="41"
                Margin="447,256,0,0"
                RenderTransformOrigin="0.5, 0.5"/>

    </Grid>
</Window>
[code-behind]
using System.Windows;
namespace WPF_MVVM_EX_App
{
public partial class MainWindow : Window
{
public MainWindow()
{
InitializeComponent();
this.DataContext = new ViewModel.StudentViewModel();
}
}
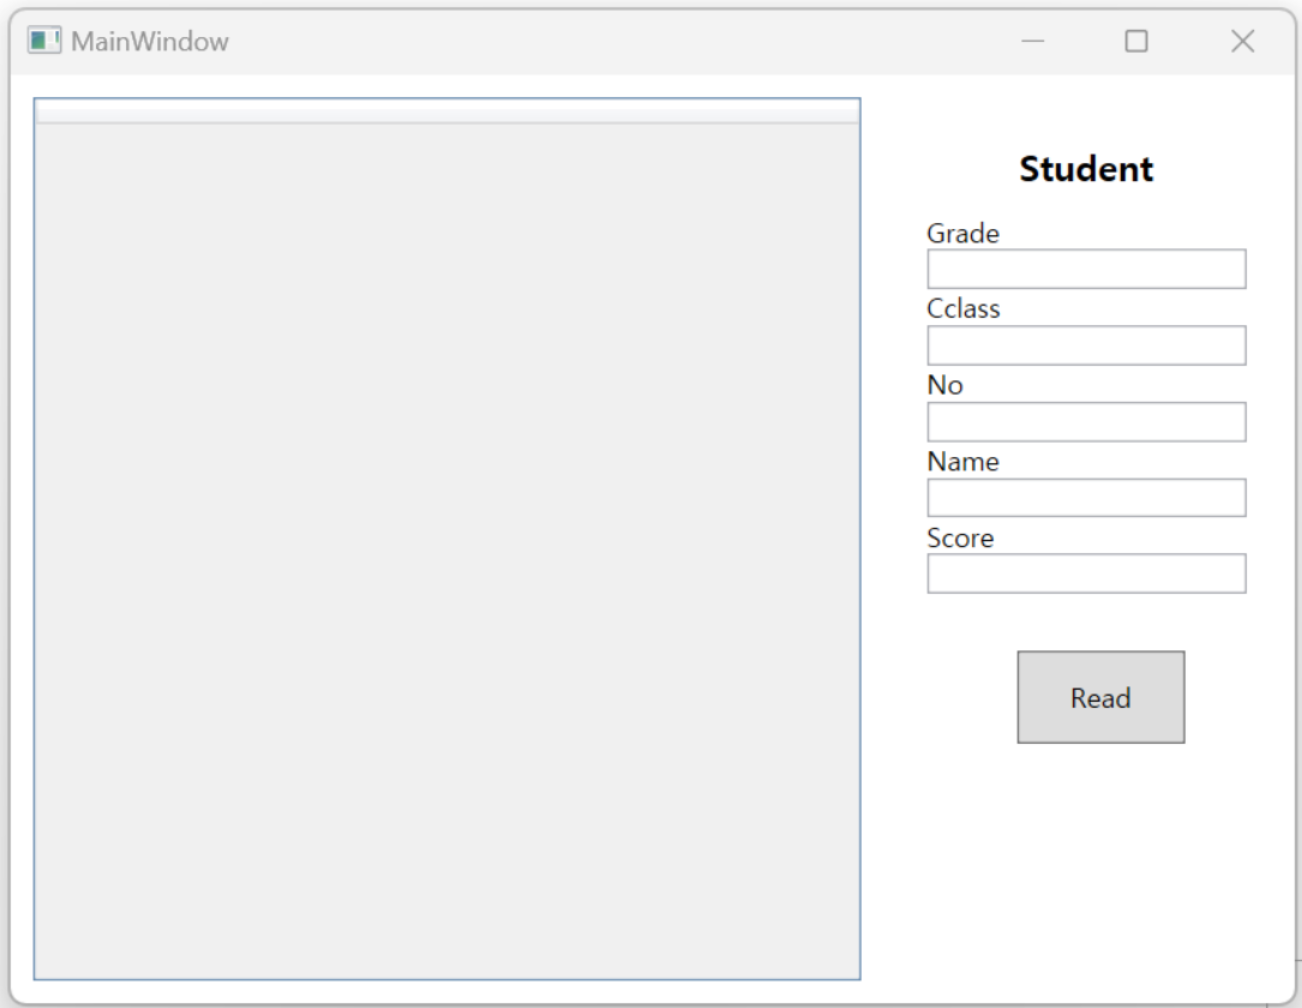
}- 좌측은 DataGrid를 사용해 학생 목록을 보여주고자 하였고, 좌측에는 선택한 학생의 정보를 보여주고자 하였다.
- ViewModel에 DataContext를 연결에 View와 ViewModel을 바인딩 해주었다.
2. Notifier
- UI를 바로 바뀔 수 있도록 하는 Notifier 클래스를 정의했다.
using System.ComponentModel;

namespace WPF_MVVM_EX_App
{
    // 속성 값이 변경되었음을 클라이언트에게 알려 UI가 즉각적으로 바뀔 수 있게 함
    public class Notifier : INotifyPropertyChanged
    {
        // 속성 값이 변경될 때 동작
        public event PropertyChangedEventHandler PropertyChanged;

        protected void OnPropertyChanged(string property)
        {
            // 이벤트가 null이 아니라면 연결된 딜리게이트로 인해 해당 함수가 동작함
            PropertyChanged?.Invoke(this, new PropertyChangedEventArgs(property));
        }
    }
}
3. Model
- 각 학생들의 정보를 가지고 있는 Student 클래스를 Notifier 클래스를 상속받아 즉각적으로 UI반영이 되도록 구현하였다.
- ObservableCollection<T>를 이용해 Student들의 정보를 받는 리스트를 만들었고, ObservableCollection는 자체적으로 Notify~ 함수들을 상속받고 있어서 UI 반영이 자동적으로 된다.
- GetAllStudent() 라는 함수를 만들어 학생들의 정보를 불러올 수 있게 하였다.
using System.Collections.ObjectModel;

namespace WPF_MVVM_EX_App.Model
{
    class StudentModel
    {
        // ObservableCollection : INotifyCollectionChanged와 INotifyPropertyChanged가 기본적으로 상속되어 구현, 리스트와 비슷하게 사용됨
        // 그러므로, 해당 값이 변경된 것을 UI에 바로 적용시켜준다는 장점이 있음!
        ObservableCollection<Student> students = new ObservableCollection<Student>();

        public ObservableCollection<Student> GetAllStudent()
        {
            students.Add(new Student() { Grade = "1", Cclass = "3", Name = "홍길동1", No = "1010", Score = "30" });
            students.Add(new Student() { Grade = "4", Cclass = "7", Name = "홍길동2", No = "1011", Score = "31" });
            students.Add(new Student() { Grade = "3", Cclass = "3", Name = "홍길동3", No = "1012", Score = "39" });
            students.Add(new Student() { Grade = "2", Cclass = "9", Name = "홍길동4", No = "1013", Score = "38" });
            students.Add(new Student() { Grade = "5", Cclass = "1", Name = "홍길동5", No = "1014", Score = "37" });
            students.Add(new Student() { Grade = "6", Cclass = "2", Name = "홍길동6", No = "1015", Score = "36" });

            return students;
        }
    }

    public class Student : Notifier
    {
        // 각 항목별 나타낼 요소들을 나타냄
        // 구현한 Notifier를 상속받아 값이 변화하면 OnPropertyChanged 함수를 실행하여 해당 값이 UI에 바로 적용되도록 하였음
        private string grade;
        private string cclass;
        private string no;
        private string name;
        private string score;

        public string Grade
        {
            get => grade;
            set
            {
                grade = value;
                OnPropertyChanged("Grade");
            }
        }

        public string Cclass
        {
            get => cclass;
            set
            {
                cclass = value;
                OnPropertyChanged("Cclass");
            }
        }

        public string No
        {
            get => no;
            set
            {
                no = value;
                OnPropertyChanged("No");
            }
        }

        public string Name
        {
            get => name;
            set
            {
                name = value;
                OnPropertyChanged("Name");
            }
        }

        public string Score
        {
            get => score;
            set
            {
                score = value;
                OnPropertyChanged("Score");
            }
        }
    }
}
4. ViewModel
1) ButtonCommand
- 버튼을 ViewModel 단에서 작동시키기 위해 ICommand를 상속받는 ButtonCommand 클래스를 구현하였다.
using System;
using System.Windows.Input;

namespace WPF_MVVM_EX_App.ViewModel.Command
{
    // ICommand를 사용하는 이유 : MVVM 패턴을 사용하기 위함
    // 버튼 클릭 함수 연동을 위함 -> 기존 클릭함수는 MainWindow에서 직접 관리하기 때문에 이는 MVVM 패턴에 위배됨
    // 버튼 클릭 함수를 ViewModel 단에서 제어하기 위해 ICommand를 사용해서 버튼 클릭을 사용
    public class ButtonCommand : ICommand
    {
        // Action<T> : delegate가 리턴값이 없을 때만 사용 가능, 매개변수는 받을 수 있음
        private readonly Action _execute;

        // Func<T> : delegate가 리턴값이 있을 때 사용, 매개변수는 받을 수 있음
        private readonly Func<bool> _canExecute; // 실행 전 조건을 검사하는 함수

        // 매개변수가 1개인 생성자 : 함수만 실행
        public ButtonCommand(Action execute) : this(execute, null) { }


        // 매개변수가 2개인 생성자
        public ButtonCommand(Action execute, Func<bool> canExecute)
        {
            this._execute = execute;
            this._canExecute = canExecute;
        }

        public event EventHandler CanExecuteChanged;

        // 버튼 활성화 여부를 결정
        public bool CanExecute(object parameter)
        {
            if (this._canExecute == null)
            {
                return true;
            }

            return this._canExecute();

        }

        // 실제 실행할 함수
        public void Execute(object parameter)
        {
            this._execute();
        }


        public void RaiseCanExecuteChanged()
        {
            this.CanExecuteChanged?.Invoke(this, EventArgs.Empty);
        }
    }
}
2) ViewModel
- Model 객체를 생성해 ViewModel에서 Model에 접근할 수 있게 하였고, ICommand를 이용해 Read버튼을 ViewModel 단에서 처리하도록 하였다.
using System;
using System.Collections.ObjectModel;
using System.Windows.Input;

namespace WPF_MVVM_EX_App.ViewModel
{
    class StudentViewModel : Notifier
    {
        // Model 객체 정의
        Model.StudentModel model = null;
        public Model.StudentModel _Model
        {
            get => model;
            set
            {
                model = value;
                OnPropertyChanged("_Model");
            }
        }

        // 생성자
        public StudentViewModel()
        {
            // ViewModel이 생성되면 Model도 자동으로 생성되도록 만듦
            model = new Model.StudentModel();
        }

        // 화면에 표시되는 학생들(항목)의 리스트
        private ObservableCollection<Model.Student> showStudents;
        public ObservableCollection<Model.Student> ShowStudents
        {
            get => showStudents;
            set
            {
                showStudents = value;
                OnPropertyChanged("ShowStudents");
            }
        }

        // 선택된 학생(항목)
        private Model.Student selectedStudent;
        public Model.Student SelectedStudent
        {
            get => selectedStudent;
            set
            {
                selectedStudent = value;
                OnPropertyChanged("SelectedStudent");
            }
        }

        // ButtonCommand를 담을 ICommand
        private ICommand readCommand;
        public ICommand ReadCommand
        {
            get
            {
                // ?? 연산자 : 왼쪽 값이 null이면 오른쪽 값으로 처리한다는 의미
                return (this.readCommand) ?? (this.readCommand = new Command.ButtonCommand(Read));
            }
        }

        private void Read()
        {
            // 모든 학생들의 정보를 읽어옴
            ShowStudents = _Model.GetAllStudent();
        }
    }
}
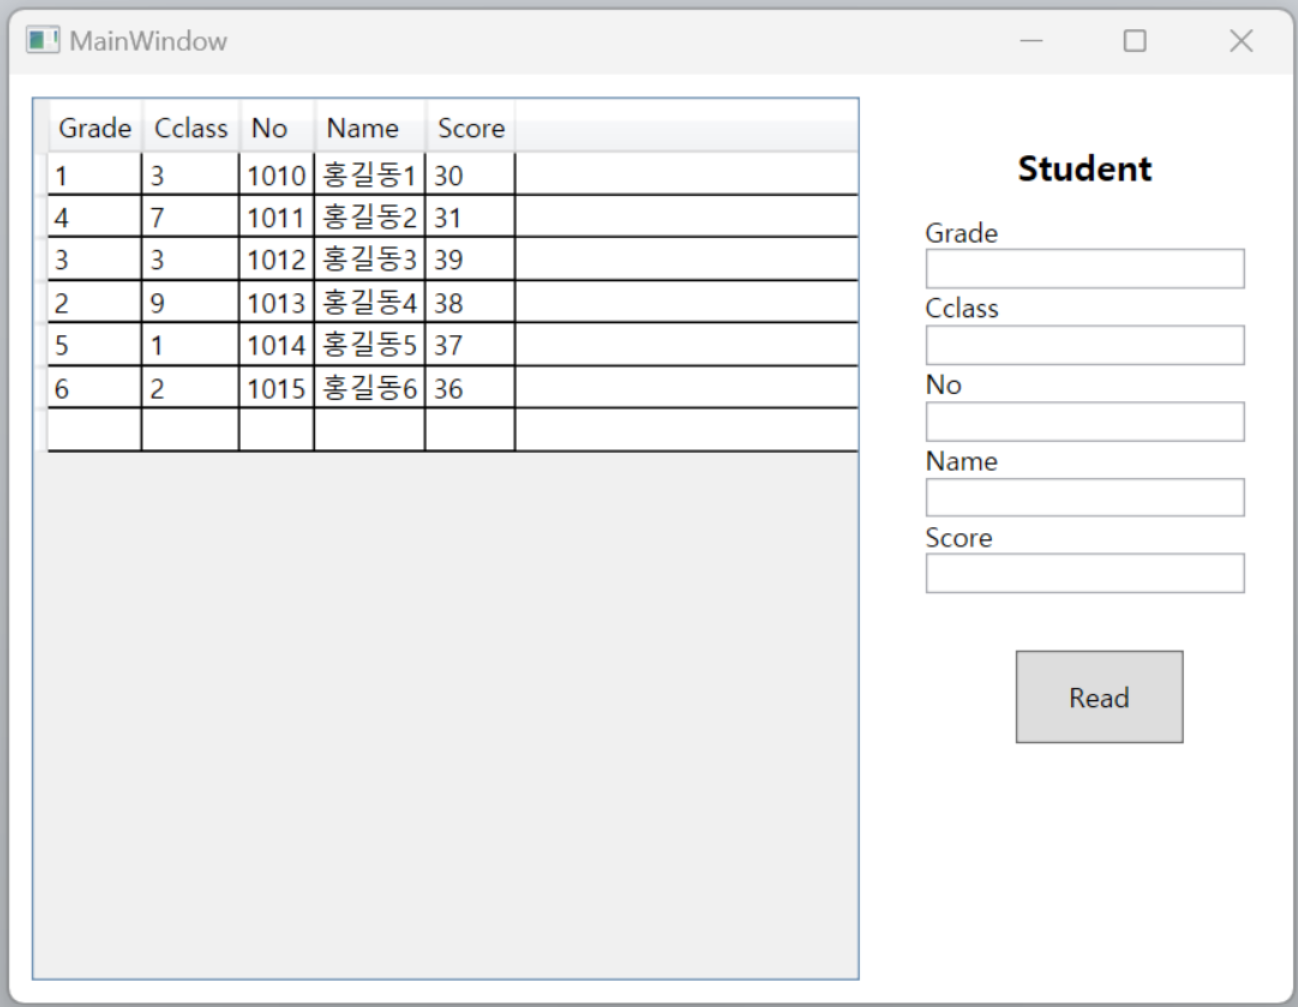
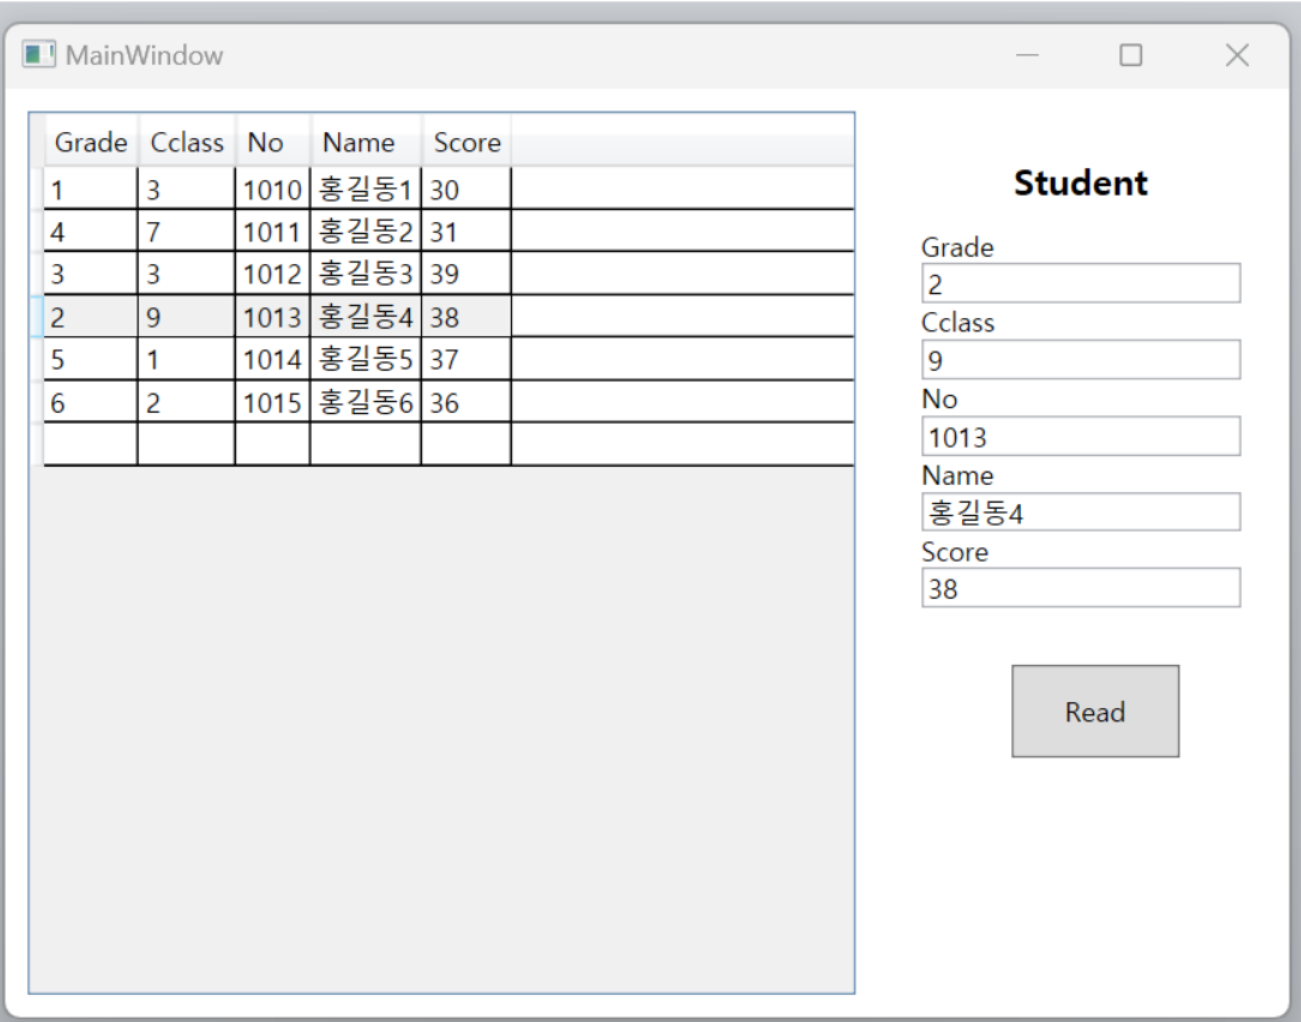
5. 결과
- Read버튼을 누르면 좌측과 같이 학생들의 정보를 불러오고, 한 학생을 클릭하면 우측에서 해당 학생의 정보를 한 눈에 알아볼 수 있다.
cf) 참고 블로그
https://magpienote.tistory.com/51
WPF MVVM 패턴을 이용한 앱 만들기(MVVM패턴 예제)
안녕하세요 까치 입니다. Visual Studio 를 다운 받아서 WPF를 공부를 하면서 WPF는 MVVM패턴을 이용하기가 최적화 되어있다는 것을 알 수 있었습니다. MVVM패턴을 어떻게 이용할 것 인가 에 대해 고민을
magpienote.tistory.com


